The E-commerce world continues growing rapidly. Modern shoppers love options, but what are the key drivers of loyalty in an online world? The answer? Delivering on convenience, an expected level of customer service, and most importantly, reliability. Whether you’re only beginning your Shopify Plus web build journey or you’re ready to upgrade a current site, here’s the “need to know” info that can save you time and headaches.
With Shopify Plus, you get more flexibility, support options, and access to your store's source code. Plus takes everything to the next level with more customizability. Many of the world’s top brands use Shopify Plus, from Lord and Taylor to Gaiam, Flower Beauty, To Boot New York, European Wax Center, and more. Upgrading to Plus provides companies like these with the tools and flexibility digital audiences crave.
If you’re wondering, “Where do I start?” or “How can I make the most of this new platform to streamline and further grow my business?” It’s important to note that the process of building a Shopify Plus site is no simple turn-key solution. In most cases, you’ll need the helping hand of a Shopify Plus Specialized agency partner to smooth out the transition and show you the ropes. Read more to find out what steps you’ll need to take to move your eCommerce business to Shopify Plus!
Step 1: Take a look at what you’ve got
If you’re already on Shopify Plus, you’re ahead of the game. The first thing to consider is what your existing systems are and how those are going to be playing with Shopify Plus. Think, where are orders going? Where are your products coming from? Where are your sources and destinations for data? Dive deeper into what you have, what your existing systems are, and how far you want to go.
One of the immediately noticeable changes is the standard Shopify admin will be enhanced. The new organizational management tool simplifies the management of your entire business. You can manage users, create new stores, populate them with data, update workflows, and view a high-level overview of key business metrics across all your stores.
Step 2: Set up your products
Our dev team usually recommends creating a few products manually just to get a feel for it in Shopify admin. Don’t forget to write titles, descriptions and upload high-res images so customers know what they’re buying.
Don’t have products yet? Use Oberlo! This can be found on the Shopify website. Oberlo is a drop shipping service that supplies you with products for your store.
Organize your products into collections so it’s easier for your customers to search for the products you’re selling. There are two types of Collections:
- Manual: individually select every item included
- Automated Collection: using product tags
Step 3: Set up a Theme
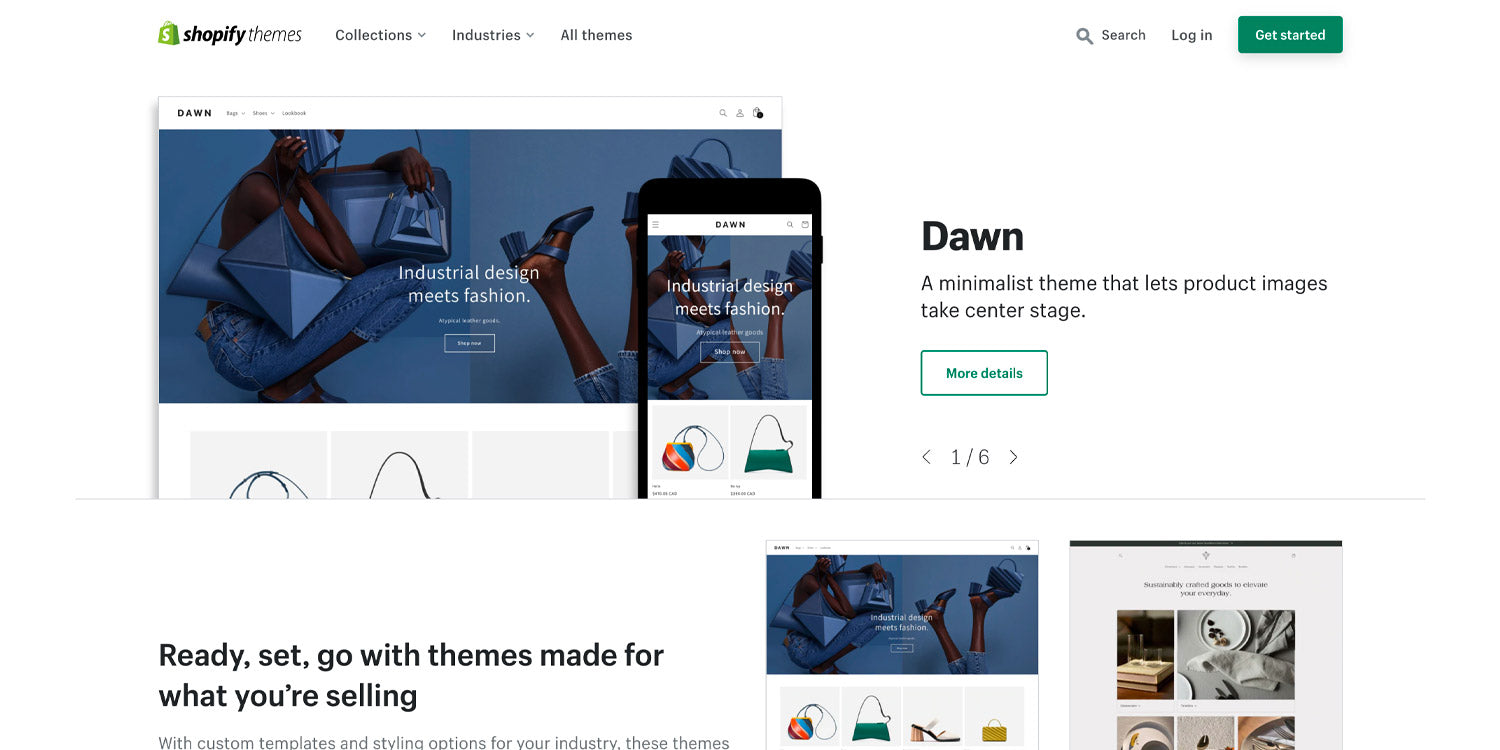
You can do this by using Shopify’s Theme Customizer. Choosing a theme when developing your website helps distinguish your brand’s identity. This defines what your store looks like. You can choose from Shopify's options to customize your colors, fonts, imagery, layout, and more!
For website owners, choosing the right theme is key to introducing their site to their readers. With a unique theme and website design, you will attract more customers and make your profile more eye-catching. This leads to an increase in customer rates and the growth of your online business. Establishing your brand identity is the first step when choosing a theme for your brand. For instance, what colors are going to reflect your brand? Explore the meanings of these colors. Colors play a significant role in making customers decide whether or not to engage with your brand. Using color to express your brand sets a mood, but it also creates a mental association with the brand's meaning in the context of the world in which it lives. Lastly, search for overall inspiration.
Step 4: Get your backend settings in place
Set up your backend settings. This is your chance to set up your payment processing, shipping, and marketing channels (Facebook and Instagram so you can easily create ads and shoppable posts).
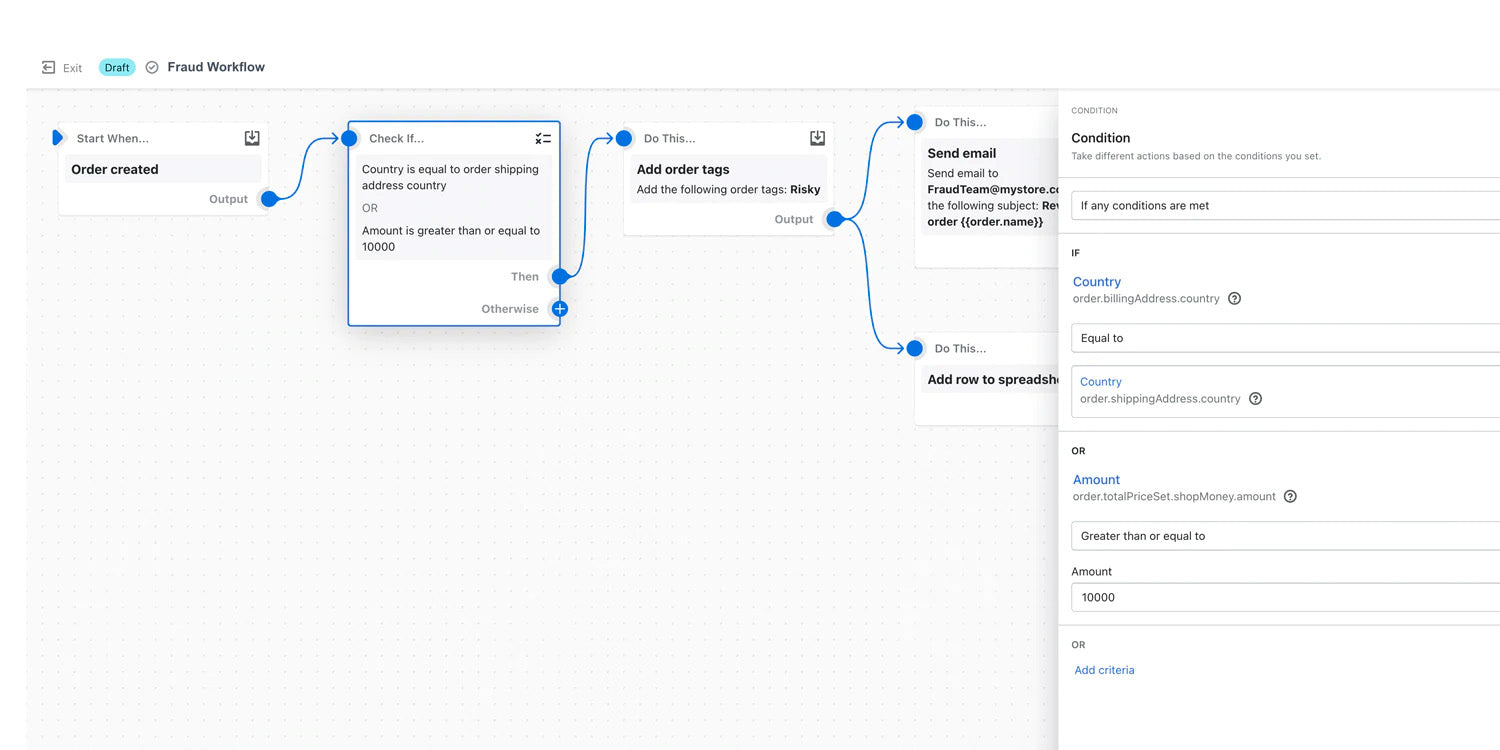
Some specific Shopify Plus tools that you might find helpful within this process are Shopify Scripts, Shopify Flow, and Launchpad.
Looking for a way to automate repetitive tasks in your store? With Shopify Flow, you can automate tasks and processes across all your apps and your eCommerce store. These tasks include customer service, fraud prevention, design and development requests, merchandising, communications, and marketing and advertising.
The Shopify Scripts tool gives you the ability to create promotions and customizations that are viewable without using a discount code, which will reduce any headaches you might encounter when shopping! Easily customize the look and feel of your checkout, as well as custom fields, shipping options, and payment methods. Make the checkout experience more personal based on shopping cart values using the Script Editor.
With Launchpad, you can automate any upcoming event or campaign without any hassle. Reports will be produced and provided on the event's activity so you can compare this year's sales with last year's and determine the best strategies for next year.
Step 5: Set up a redirect
A URL redirect is a technique to redirect your visitors from one URL (your page) to another page. There are several types of URL redirects, the most common being 301. A 301 redirect is known to be the best method for SEO and executing redirects on a website. This method is a permanent redirect that gives the redirected page full link equity (ranking power). Other types of URL redirects include 302 “Found" (Moved Temporarily), Meta Refresh, etc.
Upload all your old URLs into the redirect section of the Shopify site and redirect all your products to the new URLs. Creating a URL redirect is important for SEO because it prevents your visitors from experiencing “404” or “page not found errors”.
If your website has many deleted pages or updated URLs with no redirection, Google might think it’s broken and will penalize your rankings and visibility.
How to redirect:
- Log in to your Shopify store
- Click on ‘Online Store’ from the menu on the left-hand side
- Select ‘Navigation’ from the submenu, then select “URL Redirects”
- On prompt, click on “Create URL redirect”
- In Redirect from, enter the old URL you want to redirect visitors from
- In Redirect, enter the new URL that you want to redirect visitors to. If you want to redirect to your store’s home page, then enter /
- Once done, click on “Save Redirect”
Step 6: Set up all of your legal store policies
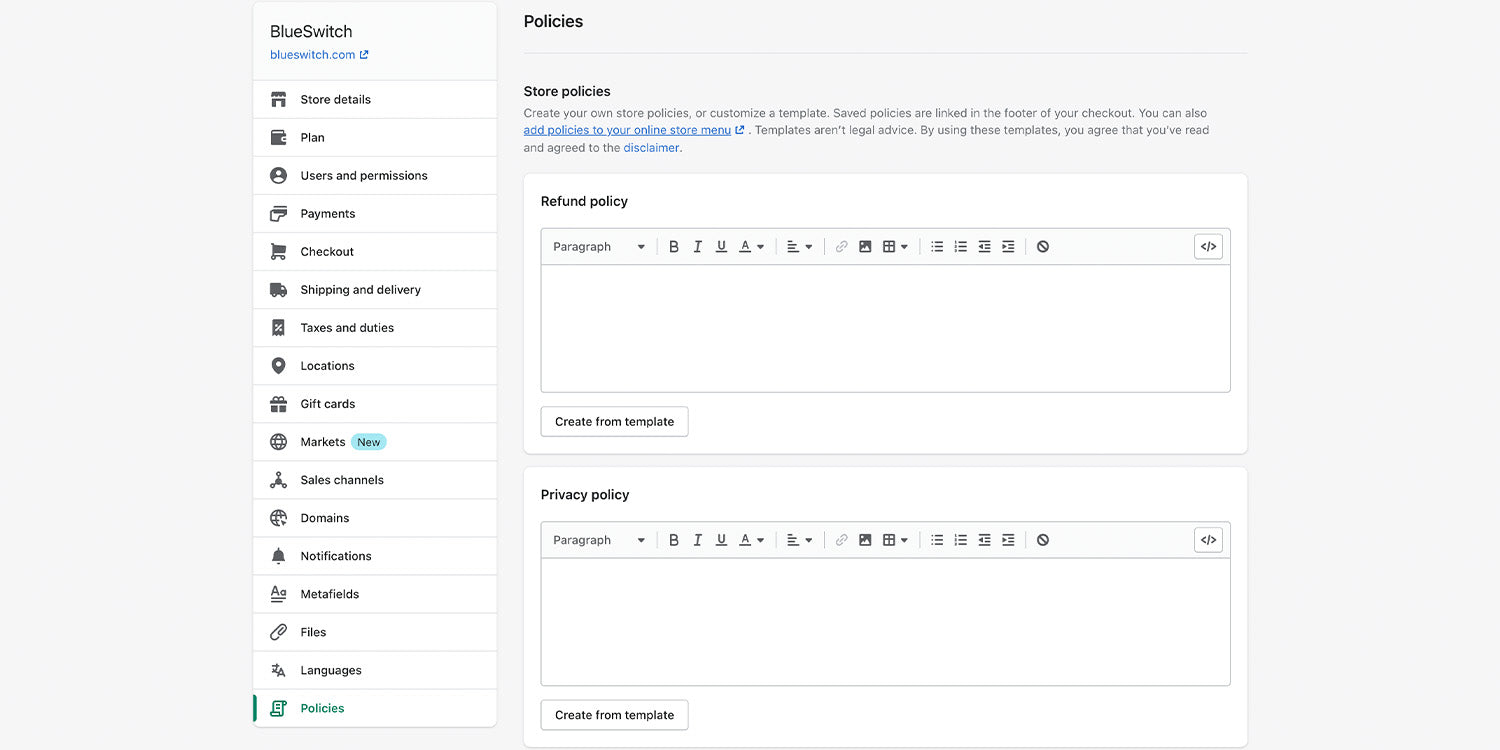
This is crucial for any business. You wouldn't want to lose the trust you've built with your customers. Ex: If the return or refund process meets your customers' expectations, this creates a sense of security for them and they're more likely to trust your business. Another important reason is that this increases sales and can attract new customers, it is an aspect of your website that is seen by many people. The last reason is professionalism. Including legal policies in your website development will show how professional and responsible your business is. Customers are more likely to purchase a business that appears to be professional and has all the policies they expect to find on their website.
You can add or generate the following policies for your Shopify store:
- Refund policy
- Privacy policy
- Terms of service
- Shipping policy
- Legal notice
Step 7: Update your Google Search Console
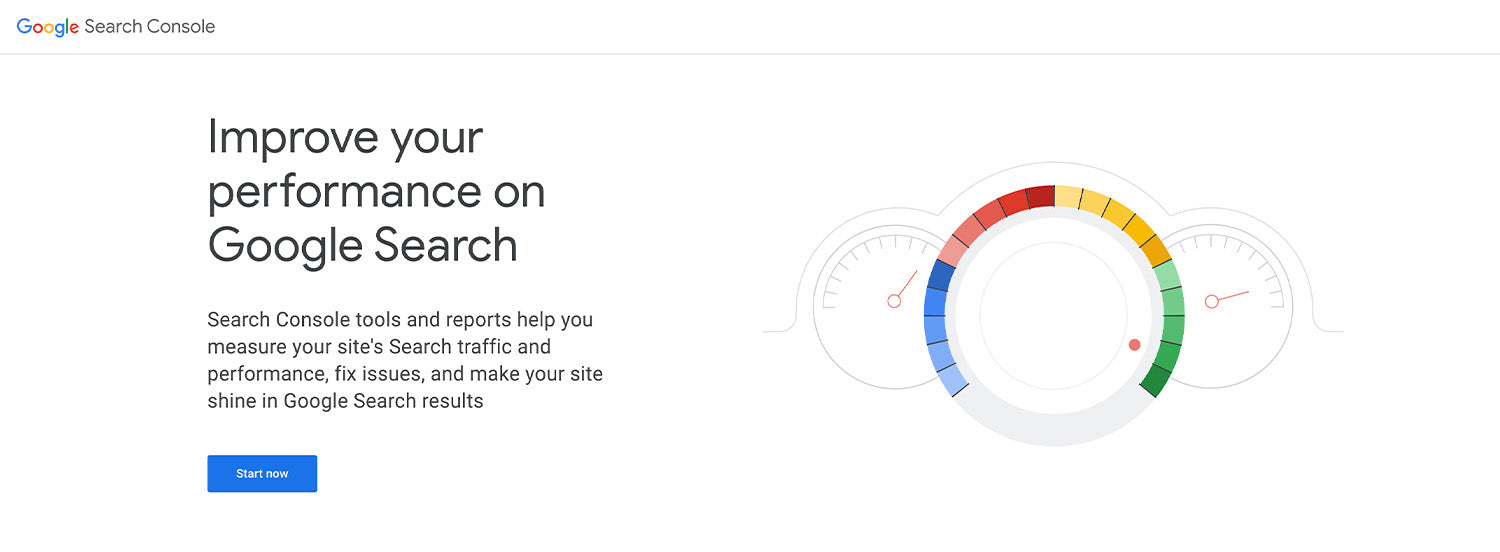
Keep in mind when going through your Shopify Plus website build, it is essential to update your Google Search Console. You wouldn’t want to lose your SEO and everything you’ve earned.
Make sure you continue to measure your traffic, performance, status, any issues with your website and optimize your visibility.
Step 8: Test everything
The last and most important step when you are finalizing your website development is to make sure you test everything! For instance, make sure all your links work. It is important for you to ensure that your customers aren't faced with any difficulties while purchasing your products. Go through a QA, check out, and test all your data collections,
Another benefit Plus has is the Shopify Plus Partner Sandbox. This is where you can create a sandbox store when you are done with your Shopify Plus website build. The Shopify Plus Partner Sandbox lets you make an unlimited number of test purchases through the bogus gateway payment provider. Another benefit is you can also create demos for prospective merchants.
If you're just starting your website development journey or upgrading your Shopify site, there's no harm in doing some research now! Switching over to Shopify Plus can be tricky, so if you have any questions left, don't worry. Feel free to contact a member of the BlueSwitch Dev Team if you would like more professional one-on-one guidance.
In addition, once you upgrade to Plus, you will be given access to an online seminar called Jumpstart. This webinar will cover all the spot Shopify basics such as its features and resources. During this webinar, Merchant Success Managers will give you a breakdown of the support system. These live sessions also include a Q&A session so you can ask anything you’ve been wondering since joining.
We want you to succeed in your Shopify web build journey. That is why we’re giving you the tools you need to make your business thrive.